Blog
Changing Analysis Settings in Nexus
Many users of Nexus Copy Number simply use the default settings to analyze their data. This is fine. For some samples, however, it may be necessary to adjust the analysis settings to optimize the results. But often users are either not familiar with the setting parameters, or simply don’t know how best to adjust the settings. I will try to make this step clear and easy in this post.
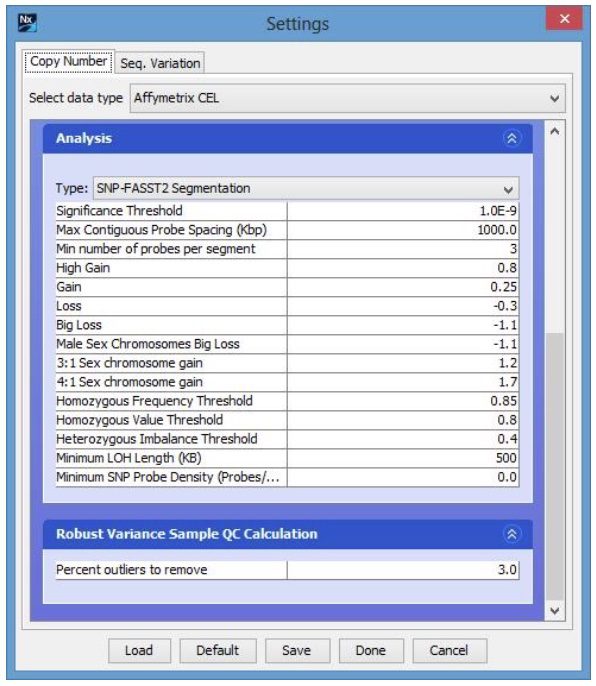
Users can click the word “Processed” in the Status column under the Data Set tab to display the settings that have been used to process the sample. To change the settings, though, users have to go to File -> Settings and select the right data type (e.g. Affymetrix CEL or Illumina) for the samples. People may be a little overwhelmed by the number of parameters in the Settings window. In reality, only Significance Threshold may be the setting that needs to be adjusted.

Significance Threshold determines the number of segments that will be created from the data. It is similar to a P value, with smaller value being more stringent and fewer segments generated, and vice versa. The No. 1 factor to consider in adjusting theSignificance Threshold is the probe density. Higher probe density arrays like Affymetrix CytoScan HD should have a lower Significance Thresholdvalue (e.g. 1.0E-9). A lesser factor affecting the decision to adjust its value is the data noise level, which is measured by the Quality score in Nexus Copy Number. Noisier data with higher Quality score usually requires a lower (more stringent) Significance Threshold value, simply to minimize the false positive calls.
Clicking the Done button will save the changed settings inside Nexus. To apply the new settings to the samples, a user needs to HIGHLIGHT them in the Data Set tab and click the “Reset” button. After confirming the warning message that Reset will discard the existing results, simply click the View button and the selected samples will be analyzed again with the newly changed settings.
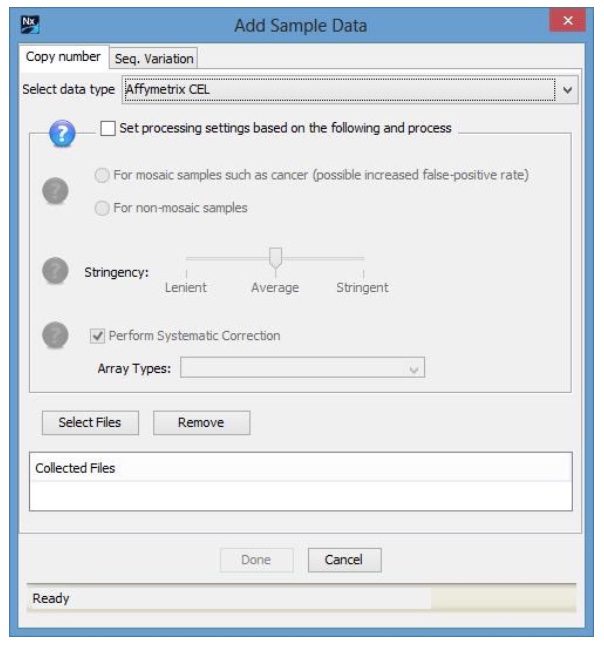
An important step users may not be aware of is that the current settings may be overwritten if new data are loaded using the Load Data window. Going through the check boxes in the Load Data window will introduce the default settings, which may be right if no settings have been optimized when data were loaded the very first time. To prevent the current settings from being replaced by the default settings, simply uncheck the first box “Set processing settings based on the following and process”. This will gray out the options in this window and allow the user to load the data files. As a result, the current settings will be kept and used for the data processing.

